Personal Websites
Why do a personal website?
Firstly, they serve as a centralized hub for findable information about you. This makes it easier for other people to google you for conferences, reviews, seminars, jobs, etc. They also act as a CV, that you can update over time, removing the need to remember every things you’ve done so far in your career. They also allow you to update them when you want (e.g. before a conference, hunting for jobs, etc.). And finally, having your own personal website means you own the professional information on it and it’s not used for unethical practices or profit on other platforms (e.g. Research Gate or LinkedIn).
Personal websites tutorial
Here’s a quick tutorial on how to create personal websites through github and jekyll. There are many other ways to create your own website but this one is very personalisable, easy enough to set up and update and hosted for free on github automatically.
0 - Getting started
To start you’ll need:
- a GitHub account (easy)
- access to a Unix terminal
- Linux: you know the drill
- MacOS: open the app in
/Applications/Utilities/Terminal - Windows: you can install Cygwin or any other equivalent
You’ll then need the following packages installed on your terminal:
git. But you can also use agitinterface if you prefer pointing and clicking such asGitHub Desktop.ruby.
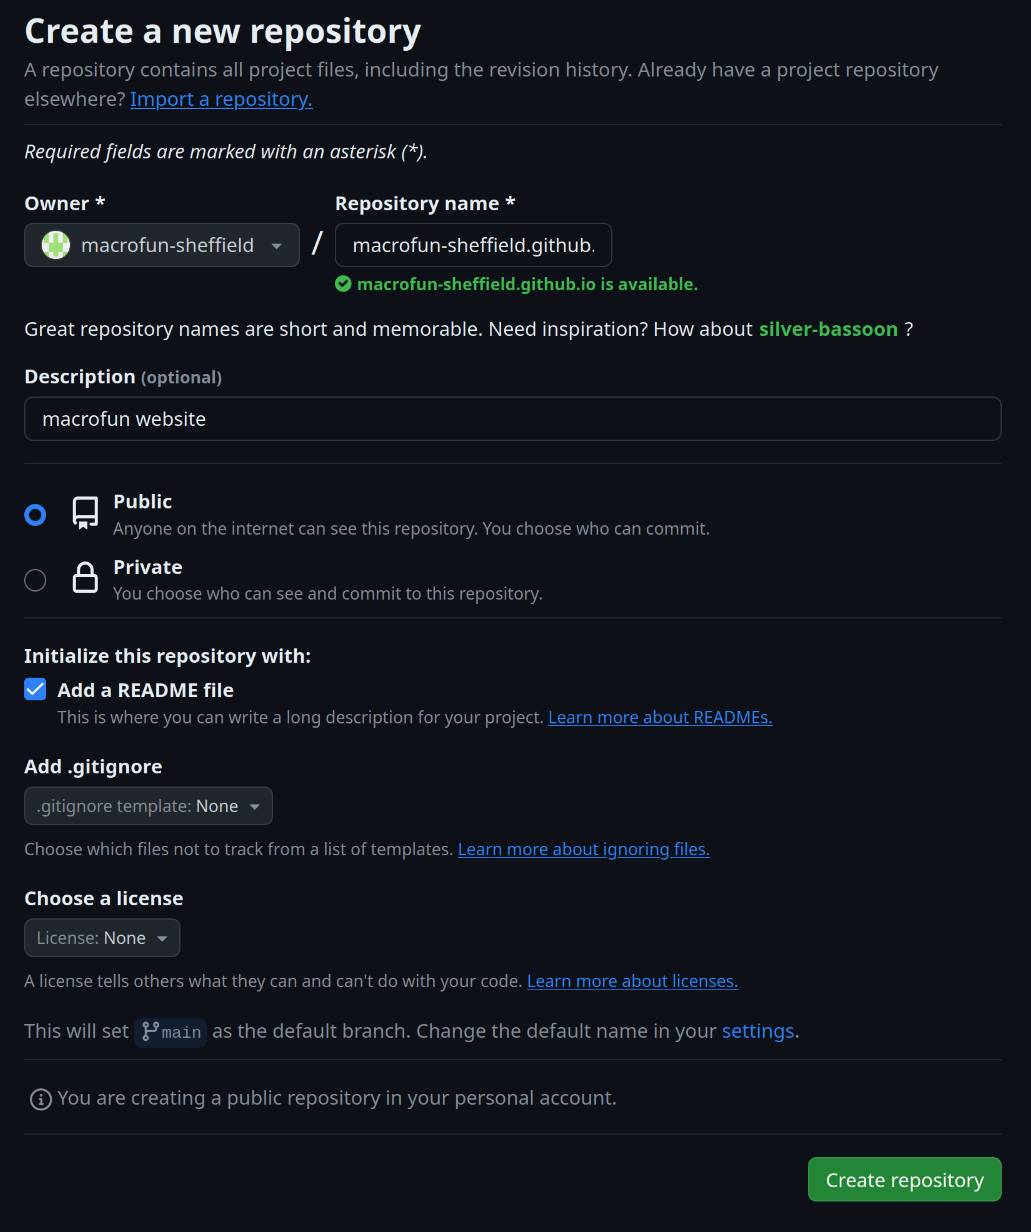
1 - Set up your GitHub repository
You can then create a new repository on github called username.github.io where of course username is your actually account name. For each users, github allows the hosting of a website with this URL. For example, we now have macrofun-sheffield.github.io!
Once you’ve created your repository, make sure it’s synced with your machine locally:
- if you created it through the github website you can clone it locally using the terminal or through your interface (in GitHub Desktop go File > Clone Repository and type your repo’s name).
- if you created the repository directly on your terminal or through your interface, you can simply push it online.
2 - Install jekyll and create your website
This was all the set up. Now it’s gonna get fun! You can install jekyll which provides a cool set of free website templates and - even nicer! - very easy and clear tutorial on how to install them.
Note that you might need to be a super-user to do these actions. Just add
sudoat the start of every line (and don’t worry when it’s asking your password, it’s recording what you’re typing - just not displaying it)
gem install bundler jekyll
And then generate the base webpage by overwriting the boring empty github one:
jekyll new --force macrofun-sheffield.github.io
Note that here
--forceerases what was on my local version ofusername.github.io. So technically we could have reversed step 1 and 2 but this way gives GitHub some time to initialise your URL.
Regardless you can now go into your website repository and run it locally:
cd macrofun-sheffield.github.io
bundle exec jekyll serve
And you can browse your beautiful page on http://127.0.0.1:4000/.
Note that you might be missing some packages at this stage. You can easily add them by looking at what the error message says:
user@user: Could not find gem 'minima (~> 2.5)' in locally installed gems.
user@user: Run `bundle install` to install missing gems.
## Installing minima:
gem install minima
Okay, so it’s actually not that mind blowing but it’s a start. But we can start with the basic modifications (title, etc.) by editing the _config.yml file. For example you can change the following parts easily:
title: macrofun
email: t.guillerme@sheffield.ac.uk
description: >- # this means to ignore newlines until "baseurl:"
  Write an awesome description for your new site here. You can edit this
  line in _config.yml. It will appear in your document head meta (for
  Google search results) and in your feed.xml site description.
baseurl: "" # the subpath of your site, e.g. /blog
url: "macrofun-sheffield.github.io" # the base hostname & protocol for your site, e.g. http://example.com
github_username:  TGuillerme
If you want you can push it to GitHub to even see it live!
3 - Browse and install a template
The easiest way to install and modify a template is to browse some on jekyll, find one you like and follow the installation instructions! For example, I’m going to use and modify feeling-responsive
Thomas Guillerme SESSION
coding tutorial jekyll GitHub